 |
0. SETUP: Open Groups.fmz, enlarge the modeling window to maximum size, close all palettes except Layers, Objects, Prompts, Surface Styles & Symbols. Pick WIndows menu > Window Frames. At the bottom of the window, set the grid to 2". | |
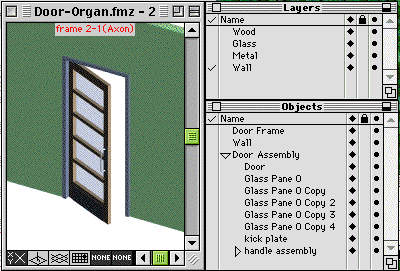
| 1. INSPECT THE OBJECTS PALETTE: click in the first column to see which objects are which. Note that the checked names are highlighted in the graphics box | ||
| 2. GROUP OBJECTS INTO HIERARCHIES: Highlight only the door handle and pull plate, then click on the Group object in the 7th row of the icon palette to create a Group them. Observe the result in the Objects window. You can rename Group 1 as Handle Assembly. Highlight the remaining parts of the door and click to group the whole door. Name it Door Assembly. |
||
| 3. TRANSFORM THE GROUPS: In the Objects Palette, select the Handle Assembly. In the Front view, you can move the parts of the Handle up and down together. Set the Topological level to Group and click on the door to pre-pick the whole Door Assembly. In the Top plan view, you can Rotate the door without disturbing the wall. |
||
| 4. MAKE A DOOR SYMBOL: With the door in it's original location, highlight the whole Door Assembly Group. Pick the S-Create symbol icon and click on the bottom left corner of the door in the front view. Create a new library named New.zlb in the same folder as your file. In your Objects Palette, a new object appears. It is an instance of the symbol in your library. |
||
|
5. PLACE THE SYMBOL: Pick the S-Place icon and click on the elevation view to place new instances of the door symbol in the wall. |
||