To learn how computer modeling can enhance design exploration
- practice using Boolean operations (union, subtraction, intersection)
- develop 3D forms by inserting segments and shapes
- use layers to organize design alternatives
- enhance accurate computer-generated perspectives with fluid hand-drawing

3D interpretation of a Le Corbusier's Purist painting by Dan Van Calcar
Part I. 2D drawing into 3D Variations
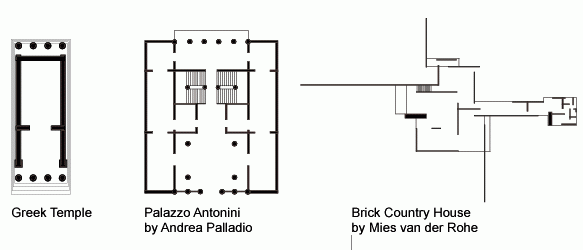
Explore the expressive possibilities of interpreting 2D lines into 3D form. Re-reading an ambiguous image can add new meaning to a project.
1. START IN 2D: Start by drawing your own plan of a room or building, using plans we have created (see below) or by using a scanned 2D image as an underlay.
2. SCHEME: Sketch alternative possibilities for the character of the window and door openings, ceiling, roof and floor. (heights, shapes, edge profiles)
3. BUILD up one version of the walls on layer walls1, then try different roof structures using layers roof1, roof2, etc. Use the layer palette to try different alternates together.
4. RENDER: Find a viewpoint that shows off your design variations. Adjust the lighting and render at least 3 design variations taken from the same view at approximately 200 x 300 pixels.
5. PLACE IMAGES & UPLOAD: Save JPG files of these views as 4.1.jpg, 4.2.jpg, 4.3.jpg in your "images" subdirectory. Place your homework images from the last two weeks on assign03.html and assign04.html webpages and upload to your DARKWING OR GLADSTONE images directory.
Part II. Development with hand-drawing
By working in different modes or media, a designer can perceive a project in different ways. Freehand sketching allows quick experimentation and re-reading but has little dimensional precision and allows lots of inconsistency. Since three-dimensional computer modeling provides geometric precision and consistency between views, but lacks ambiguity, it makes a strong complement to sketching. Using a computer-generated perspective as a sketch underlay combines geometric precision with free exploration.1. PRINTOUT: Find and save a realistic eye-level view of your favorite version from Part I that highlights an area you want to develop. Create a hidden-line interior room perspective or exterior massing perspective. Laserprint the contents of the window to fit on an 8 1/2" x 11" or 11"x17" size paper.
2. HAND-RENDER 2 VERSIONS: Develop 2 alternative versions by drawing or painting over this perspective in pencil, ink and markers or watercolor. Use paper appropriate to the medium. Use translucent paper for ink and markers OR use a light-table to trace the main lines onto opaque drawing or watercolor paper.
Use the hand drawing to alter aspects such as
- Profiles of structural members and wall openings
- Connections and assemblies
- Bases, panels, cornices and moldings
- Lighting and material finishes
These images should later be scanned and included in your final portfolio.
- --Evans, Robin, "Translating from Drawing to Building", AA Files
- This theoretical essay explains how the act of representing architecture on paper requires a process of abstraction that can enrich the final built project.
- --Modeling References