iMovie Stop Motion animation
This page is part of my survey on how to make movies.
You can create a movie from an image sequence using iMovie'09. It comes with every new Mac, so for the occasional animator this is a simple way to get going. Although it's easy to work with movie clips (combine them, edit them, add sound etc.), it's not so straightforward to make "flip-book" animations (a.k.a. time-lapse movies) from a sequence of images.
The steps shown here let you make a basic animation with sound. There are other free applications that can make animations without sound, e.g., Time Lapse Assembler. The iMovie approach is more complicated but rewards you with more editing flexibility, including sound.
Another approach to do the same thing, but platform-independent (and open-source), is to use the 3D modeling software Blender.
A limitation of iMovie '09 is that single images can't be played back at the fastest frame rate of 30 fps appropriate for NTSC video. However, if the frame rate is too slow for your purposes, you can always speed up the end result later. This is the first method I'll describe.
There is one drawback: if you have to work with a slow frame rate that doesn't correspond to real time, it gets difficult to synchronize sounds. Imagine you have an existing sound file and want to adjust the frame durations to that sound; then you need to edit your clips in real-time. Therefore, I also tried an alternative solution: first convert each frame image to a one-frame movie, then import these movies and string them together to make your animation. With this trick, you can coax iMovie '09 into producing a 30 fps frame rate.
Import an image sequence to create your animation
To begin, import the image sequence into iPhoto by drag-and-drop. Then open iMovie and follow these steps:
-
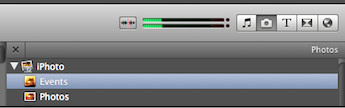
It's convenient to have the image sequence as your last import in
iPhoto,because then you'll immediately find them under that same folder name iniMovie'simage browser. -
In
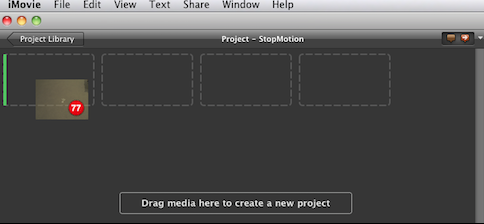
iMovie, create a New Project, call it (e.g.) "StopMotion" -
In
iMovie, open the media browser,
-
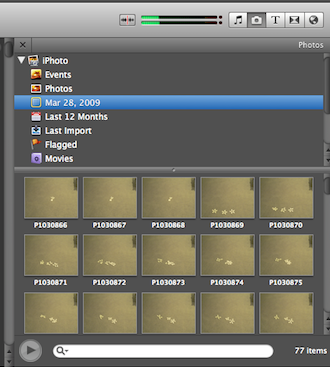
In this example, I select 77 images from the
iPhotolibrary, shown in the media browser:
-
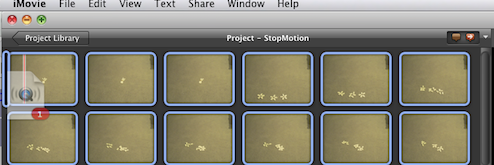
Drag the images to the new project:
-
The process may take a while:

-
Select all images in the new project, and select
Window > Clip Adjustments. Type in a duration such as0.05and check the box for "Apply to all stills":
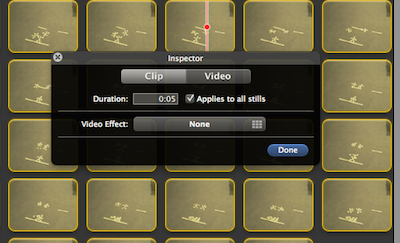
ClickDone. -
What if you can't get the duration short enough? It may be that your version of iMovie doesn't allow you to go below a clip duration of
0.1s. That's too slow for a smooth movie with fast-moving objects. The work-around for this involves some arithmetic: say you want the shortest frame in your animation to be0.025seconds long. Then set its duration to the minimum of0.1sfor now, and scale up the durations of all other frames in your animation by the corresponding factor of4. You will then be exporting a movie that looks four times slower than desired. However, we'll fix this with one additional step at the end. Let's first complete the settings for exporting the movie. -
With all images still selected, select
Window > Cropping, Ken Burns and Rotation:
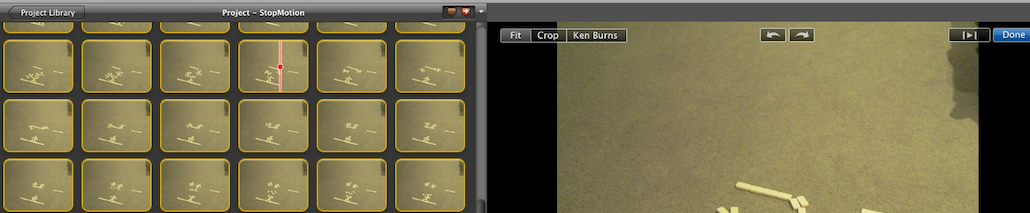
Select"Fit". -
Now you will likely want to fine-tune the animation by adjusting the frame duration of individual images. To do that, select the frame (or frame range) you want to change. Enter a modified frame delay, but make sure not to apply this to all stills. For the delay, you can enter the format
1:23(seconds separated by a colon from milliseconds), or0.2(to specify fractions of a second). PressEnterorDoneto make the change stick! -
Optionally, add sound effects by dragging from the sound browser

to the desired frame in the project:
If your movie isn't at the desired speed yet (because you had to scale the frame durations up as described above), skip this and the next step. -
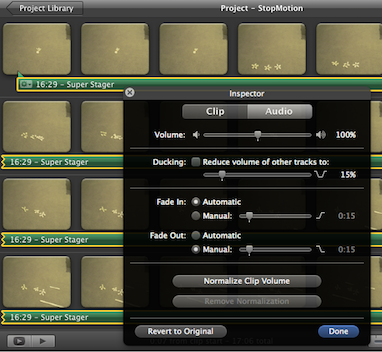
To change audio settings (e.g., fade out the sound), click on the audio clip and select
Window > Audio Adjustments:
-
Under the
Sharemenu, chooseExport using Quicktime(adjust preferences if needed):
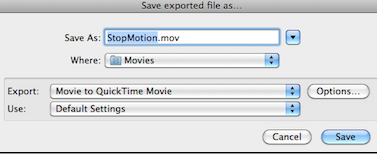
-
Now come the optional steps to speed up the exported movie. Create another
New Projectand go toFile > Import > Movie...to re-import your newly created movie back into iMovie. -
Drag the imported movie to the new project, select it and choose
Window > Clip Adjustmentsas we did earlier for the still images. But unlike before, you'll now see an entry"Speed"(depending on the format of the imported movie, you may need to click a "convert" button before you can change this setting). A slider will appear that lets you speed up the movie:

-
Finally you can go back to
Share > Export using Quicktimeand export the movie at the new speed.
Import animation frame stills as movies
This is an alternative approach which lets you import still frames with a shorter per-frame duration. I chose to aim for a duration of 0.03 seconds because that corresponds to the 30 frames per second at which iMovie exports movies (when set to NTSC format in the Preferences).
In principle, you can reduce the frame duration even further, but I noticed that when I do so it sometimes causes iMovie to lose track of the order of the imported movie clips when dragging them into a project. This is undesirable because you may then have to manually sort the frames. So the 0.03 s duration is what I consider safe, as it is also the shortest duration allowed by the old version, iMovie HD.
-
The first thing you need is a way to convert all your images to
.movformat. Here is a python script that does that.- The easiest way is to use the droplet Application linked here:
image2StillMovie
The file linked above can be unzipped into your Applications directory (or anywhere you like). To use it, just select all images and drag them onto the icon. Themovfiles will be created next to the original images. -
Step 2 is only needed if you want to use the command line. If you're using the droplet above, you may skip to step 3 now.
If you want the command line option, save the script below somewhere in your command$PATH, say at~/bin/processStills.py. Make it executable by typingchmod 700 ~/bin/processStills.py
- The easiest way is to use the droplet Application linked here:
#!/usr/bin/python
import sys,os,string
from Foundation import NSNumber
from AppKit import NSImage
from QTKit import *

def process(file):
    outfileName = string.join([os.path.splitext(os.path.abspath(file))[0],"mov"],".")
    print "creating ",outfileName
    mov, err = QTMovie.alloc().initToWritableFile_error_(outfileName, None)
    if mov is None:
        errmsg = "Could not create movie file: %s" % (outfileName)
        raise IOError, errmsg
    img = NSImage.alloc().initWithContentsOfFile_(file)
    mov.addImage_forDuration_withAttributes_(img, time, attrs)
    mov.updateMovieFile()

# Change this to QTMakeTime(10, 600) for even shorter frames:
time = QTMakeTime(20, 600)
attrs = {QTAddImageCodecType: "jpeg", QTAddImageCodecQuality: NSNumber.numberWithLong_(codecHighQuality)}
for f in sys.argv[1:]:
    process(f)
-
Navigate to the folder containing your still frames (this all happens in the Terminal, of course). If the folder name is
movieStillFolderin your home directory, do this:cd ~/movieStillFolder
If they arejpgimages, type~/bin/processStills.py *.jpg. -
Create a new folder and move all the newly created movie files into that, so they are easier to import to
iMovie:mkdir movies mv *.mov movies/
-
In
iMovie, import the above movie clips and drag them into a new project (no need to optimize them at the import stage). -
Select all clips in the project window and press
ito inspect the frame rates. To make changes, you first have to selectconvert all clips, which will possible take some time to complete. -
Now you have all clips converted and are ready to change their frame rates using the slider that has appeared. If you need a frame to be longer than the maximum allowed by the slider, you can always
CopyandPasteit as many times as is needed.
Jens Nöckel Last modified: Sun Apr 15 11:31:01 PDT 2012